
Timecode is a coding system that precisely identifies the temporal position of a frame in a video or audio sequence. It is expressed in the format HH:MM:SS:FF (hours, minutes, seconds, and frames), facilitating the synchronization and editing of audiovisual content.
In video and audio production and post-production, precise timing is crucial. Timecode serves as a digital clock that assigns a unique identifier to each frame within a recording, enabling:
One of the biggest challenges in audiovisual production is synchronizing different devices. When working with multiple cameras, external microphones, or digital effects, it is essential that all elements are aligned in time.
Timecode is an essential system in audiovisual production that has evolved over the decades to improve synchronization and editing of multimedia content. Its development has been closely linked to the evolution of film, television, and professional audio technology.
Before the advent of timecode, synchronizing audio and video was a manual and error-prone process. In film production, clapperboards were used to align sound with images, while television and radio relied on external time references.
In the 1960s, with the rise of color television and the increasing complexity of audiovisual productions, the need for a more precise and automated synchronization system emerged.
One of the earliest attempts at temporal coding was the use of audio timecode, where specific tones were recorded on separate tracks to mark time. However, this method had limitations, especially in multi-camera video productions.
To address these issues, the Society of Motion Picture and Television Engineers (SMPTE) developed and standardized SMPTE Timecode in the late 1960s and early 1970s. This system allowed time information to be encoded digitally and recorded alongside audio or video signals.
SMPTE Timecode became a global standard due to its advantages:
With the adoption of SMPTE Timecode, audiovisual production became significantly more efficient, eliminating the need for manual synchronization and enabling non-linear editing, where editors could instantly access any part of a recording without rewinding.
Over the years, timecode has evolved alongside audiovisual technology:
Timecode is a temporal reference system that allows for the precise identification of each frame in a video or audio sequence. Its structure and formats vary depending on the application, but all serve the purpose of facilitating the synchronization and editing of multimedia content.
Timecode is represented in a four-segment format:
HH:MM:SS:FF
The maximum number of frames per second (fps – frames per second) depends on the video standard used:
Example of a timecode in an NTSC video (29.97 fps):
01:12:45:18
→ 1 hour, 12 minutes, 45 seconds, and 18 frames.
This format allows editors and technicians to access any specific point in a recording without ambiguity.
There are several methods for embedding timecode into a video or audio signal. The two most common are LTC (Linear Timecode) and VITC (Vertical Interval Timecode), each with specific characteristics:
| Timecode Type | Characteristics | Advantages | Disadvantages |
|---|---|---|---|
| LTC (Linear Timecode) | Recorded as a high-frequency audio signal on a separate track. | Easy to read and record on analog devices. Used in magnetic tapes and digital recorders. | Cannot be read when the video is paused or played in slow motion. |
| VITC (Vertical Interval Timecode) | Inserted within the vertical blanking interval of the video signal. | Can be read even when the video is paused or played in slow motion. Useful for frame-by-frame editing. | Takes up space in the video signal, which can interfere with certain broadcasts or conversions. |
In modern digital productions, timecode is embedded directly in digital files as metadata, eliminating the need for dedicated audio tracks or insertions into the video signal.
SMPTE timecode uses a coding system called BCD (Binary-Coded Decimal), which represents each decimal number in its binary equivalent.
Example of how a timecode is encoded in BCD:
If the timecode is 12:34:56:24, each number is converted into its BCD binary equivalent:
Each value of hours, minutes, seconds, and frames is stored in a structured format, allowing digital devices to interpret it easily.
Additionally, SMPTE timecode incorporates extra bits to:
Timecode is directly related to hertz (Hz) and frames per second (fps) in a video system. Proper configuration of these parameters is essential to prevent synchronization errors in audiovisual content.
Examples of fps by application:
Timecode must be synchronized with these values to ensure accurate timing and seamless editing and playback.
Timecode is based on the fps setting of the system. If there are discrepancies between the actual frame rate and the timecode, issues such as:
For example, in NTSC (29.97 fps) instead of 30 fps exact, Drop Frame Timecode (DF) is used to correct the difference and maintain real-time accuracy.
Video transmission standards vary by region, affecting timecode settings.
| System | Region | Frames Per Second (fps) | Power Frequency |
|---|---|---|---|
| NTSC | USA, Canada, Japan, most of Latin America (Mexico, Colombia, Brazil, Peru, etc.) | 29.97 fps | 60 Hz |
| PAL | Europe, some parts of Latin America (Argentina, Uruguay, Paraguay) | 25 fps | 50 Hz |
| SECAM | France, Russia, Africa | 25 fps | 50 Hz |
In Latin America, most countries follow the NTSC standard (29.97 fps, 60 Hz), but some, like Argentina, Uruguay, and Paraguay, use PAL (25 fps, 50 Hz). These differences should be considered when setting up timecode in international productions to avoid compatibility issues.
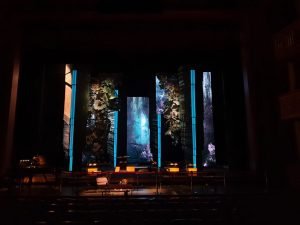
Timecode plays a crucial role in live shows by enabling precise synchronization between various elements such as video, lighting, automation, sound, and pyrotechnics. When implemented correctly, it ensures that all systems operate in harmony, reducing human errors and improving efficiency.
Before integrating timecode into a live show, the following key aspects must be defined:
A live show requires a master timecode source to ensure consistency across all devices. The timecode can be generated from different sources, such as:
The master generator distributes SMPTE timecode (LTC or MTC) to all systems, ensuring they remain in sync.
For seamless synchronization, timecode is distributed from the master source to secondary systems using various methods. Below is a breakdown of how different systems receive and interpret timecode:
| System | Synchronization Method | Example of Software/Hardware |
|---|---|---|
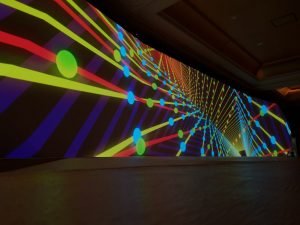
| Video | Timecode embedded in video software | Resolume Arena, Watchout, Disguise |
| Lighting | Consoles compatible with LTC or MTC | GrandMA3, Chamsys, Avolites |
| Sound | DAW or playback system with timecode | Ableton Live, QLab, Pro Tools |
| Stage Automation | Motors and controllers that read LTC | TAIT Navigator, Kinesys |
| Pyrotechnics & Special Effects | Fire control systems synchronized with LTC | FireOne, Pyrodigital |
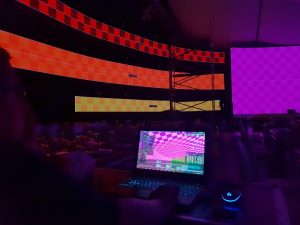
Before the live show, rigorous testing is necessary to confirm that timecode is functioning correctly across all connected systems.
Checklist for Testing Timecode:
✔ Synchronization Check: Ensure that lights, video, sound, and automation triggers react at the correct moment.
✔ Timecode Signal Monitoring: Use Tentacle Sync Studio or built-in timecode meters in lighting/video consoles to track consistency.
✔ Backup Plan: Record an LTC track onto a separate audio channel so that it can be manually restored if the primary system fails.
Once everything is synchronized, the show operates automatically using timecode as the master clock. The sequence follows these steps:
If an issue arises (such as drift or unexpected pauses), the timecode operator can adjust or override it manually using the master console.
After the performance, it is crucial to analyze the timecode performance and adjust for any sync issues before the next event.
✔ Timecode Log Review: Check for any timing inconsistencies and verify if cues fired correctly.
✔ Adjust Software and Hardware: If delays were present, reprogram cues in lighting/video consoles or adjust latency settings.
✔ Equipment Updates: Ensure that all systems remain up to date for stable timecode transmission in future shows.
Even with careful planning, timecode-related issues can occur in live shows, film, and TV production. These problems may cause sync errors, playback disruptions, or automation failures, leading to costly delays.
Below is a structured troubleshooting guide to help identify and resolve common timecode issues.
✔ Use a master timecode generator to provide a consistent reference.
✔ If using multiple timecode sources, resync devices at regular intervals (every 30-60 minutes).
✔ Implement network-based timecode distribution (Dante, PTP, or NTP) to ensure frame-accurate sync across all systems.
✔ Confirm that all devices are set to the same frame rate (fps) (e.g., avoid mismatching 30 fps and 29.97 fps).
✔ Check all cables (XLR, BNC, MIDI) for damage or loose connections.
✔ Use a signal booster or splitter if multiple devices require the same timecode feed.
✔ For wireless timecode, ensure a stable RF or Bluetooth connection with no interference.
✔ Adjust audio gain levels when using LTC (too low: unreadable, too high: distorted signal).
✔ Verify that the device is set to receive the correct timecode format (SMPTE LTC, MIDI Timecode, or embedded timecode).
✔ Ensure the device is in external sync mode, not using its internal clock.
✔ Use timecode monitor apps like Tentacle Sync Studio or Timecode Buddy to confirm a valid signal.
✔ Adjust the timecode output level, as some devices require higher/lower signal strength.
✔ Ensure that all devices are set to the same fps (e.g., using 30 fps instead of 29.97 fps can cause drift).
✔ If working in NTSC (29.97 fps), confirm whether Drop-Frame (DF) or Non-Drop-Frame (NDF) is being used consistently.
✔ When converting between PAL (25 fps) and NTSC (29.97 fps), use dedicated conversion tools (such as Adobe Premiere Pro’s Interpret Footage feature).
✔ Ensure that LTC signals are routed only to timecode input devices, not to speakers or the main mix.
✔ In DAWs like Ableton Live or Pro Tools, mute the LTC track output to prevent it from being included in the final mix.
✔ Verify that all cues are programmed with the correct fps and timecode values.
✔ If using MIDI Timecode (MTC), check for latency issues—use wired MIDI instead of wireless if necessary.
✔ In automation software (e.g., TAIT Navigator, GrandMA3), program pre-roll cues slightly earlier to compensate for latency.
✔ Enable free-run mode on the timecode generator so it continues running even when playback is paused.
✔ Use a backup timecode track that runs independently in case of playback failure.
To minimize the risk of timecode failures, follow these best practices:
Test all timecode connections before every live show or recording session.
Use a dedicated timecode monitor (hardware or software) to verify signal integrity.
Always have a backup timecode source (a second playback device or a redundant timecode generator).
Ensure consistent fps settings across video, lighting, sound, and automation systems.
Select the correct Drop-Frame (DF) or Non-Drop-Frame (NDF) settings based on your production’s requirements.
Avoid mixing different frame rates (e.g., using 25 fps video while lighting cues are set to 30 fps).
Use network-based timecode solutions (e.g., PTP or Dante) for seamless distribution across multiple devices.
If using analog LTC, ensure high-quality XLR or BNC cables for reliable signal transmission.
When working with wireless timecode, maintain a strong RF signal to prevent dropouts.
Timecode is essential for synchronizing video, lighting, sound, and automation in professional productions. However, drift, dropouts, frame rate mismatches, and latency issues can cause major disruptions.
By standardizing fps settings, performing pre-show testing, and maintaining a backup timecode source, professionals can ensure smooth, precise, and error-free synchronization. Implementing best practices and troubleshooting strategies will allow productions to run flawlessly, delivering a seamless experience for audiences.
All rights of the mentioned trademarks and trade names belong to their respective owners. There is no intention to infringe these rights. This content is provided for informational and educational purposes only.
Copyright © 2020 Plug and Pixel All rights reserved.